Jaume Ortiz 03-18-2004 07:40 AM

Hi folks.
Here you are a brief description of how I paint a face.
This is not the only way and these are not the only colours you can use to paint a face, but this is my way and my colours.
I've chosen Elite's 1st reg New York 70mm. figure
First of all I always prime(?)my figures to get an smooth surface which admits acrylic paints. I do it with tamiya spray primer. I apply two light coats and let it dry one day.


Jaume Ortiz 03-18-2004 07:46 AM

When the primer has dried I paint two thin coats of Brown sand 876 as base colour


Jaume Ortiz 03-18-2004 07:50 AM

Once the base coat has dried(few minutes) I mix some Basic skin tone 815 to the Brown sand to get a first light and apply it to the most prominent parts of the face.


Jaume Ortiz 03-18-2004 07:57 AM

Adding some more B. Skin tone I get a second light.
Lights have to be applied enough diluted because they tend to paste.


Jaume Ortiz 03-18-2004 08:00 AM

Again more Basic Skin tone,almost pure,to paint the third and last light.


Jaume Ortiz 03-18-2004 08:12 AM

Now let's go with shadows.
Adding some Burnt Cadmium Red 814 to the Brown Sand I mix my first shadow


Jaume Ortiz 03-18-2004 08:14 AM

second one


Jaume Ortiz 03-18-2004 08:17 AM

For third shadow I use Cadmium Maroon 859(that is in fact very similar to adding some black to the B. Cadmium Red)


Jaume Ortiz 03-18-2004 08:29 AM

At this stage I've painted three rude lights and shadows with no blending at all.
I've,basically,drawn the most important features of the face to give it character and live.
Now the fun begins. Is time to blend those brush strokes using the same shadows,highlights and base,very diluted.
If I have to blend a third light with a second,I'll paint with second light over the third and then again with third over the second,until the frontier between the two tones has disappeared. This is achieved through the transparence properties of acrylics when are correctly diluted.
It's hard to explain the correct dilution degree but,usually,it takes from a milky consistence to dirty water


Jaume Ortiz 03-18-2004 08:34 AM

Tonight details and special effects.
Hope this helps


Jaume Ortiz 03-18-2004 06:12 PM

Hi Folks.
Thank you very much for the nice comments.

OK,next step.
Once I've done the skin painting is time to paint some details,eyes and eyebrows,five o'clock shadow(or nine o'clock in this case),and the areas surrounding the face like hat,hair and shirt collar,that will add the character to our face and may change the contrast once painted.

I'm not going to explain any way to paint eyes,because this subject is better explained in other treads here at PF. Anyway,in this figure I had to paint them some times until I was satisfied with the result.
I outlined in black,then painted with skin tone the inside and then painted the blue iris and a light reflection with skin tone again.
I've painted too the basic colour on the hat to see what happened with contrast on the face.


Jaume Ortiz 03-18-2004 06:23 PM

Five o'clock(or nine )
I paint the beard shadow mixing the tone that is painted this area,with pure black.
If I paint beard under the chin,I mix the deepest shadow with black. If I paint it on the upper lip,I mix black with the second light (the colour on that area),and so on.
I paint it with extremely diluted washes to blend it with the adjacent areas.


Jaume Ortiz 03-18-2004 06:29 PM

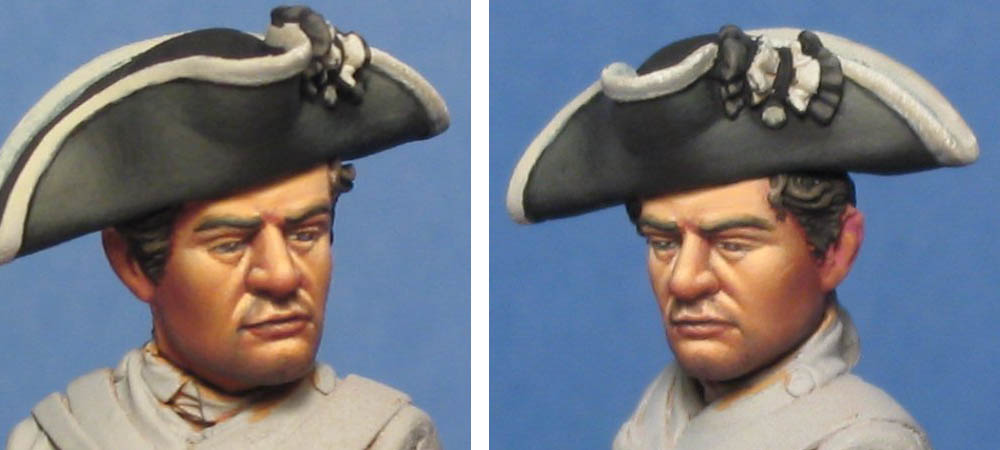
Finally I've painted the hair with black and highlights mixing some English uniform,as well as the eyebrows(don't forget to outline them) and the lower lip(with a deep shadow and adding a touch of light in the center).
The hat was painted in the same way.
Eyes were retouched as well as some highlights.
And,yes,I forgot the ears


Jaume Ortiz 03-18-2004 06:42 PM

Last one.
Here the head and chest were finished.
the eyes too(I hope so)